Common Fingerspelling Mistakes New Signers Make
One of the first concepts covered in beginning or basic sign language classes is fingerspelling. There are a few common mistakes that are made by many beginner signers related to fingerspelling. Hopefully you can recognize them in your own practice and avoid making bad habits that are difficult to break.
Signing Space When Fingerspelling
First of all, the misuse of sign space is a common mistake, specifically as it is related to fingerspelling. Yes, we have an imaginary box around us, almost like a television set that is just inches above our heads and goes off to either sides of our bodies, and then ends around our waists.
However, that does not mean that all that space is fair game for fingerspelling. For right handed signers (right dominant), fingerspelling should be done in the area to the right of center of the chest. For left handed signers (left dominant), fingerspelling should be done in the area to the left of center. It should be out away from the body about 6-8 inches (not too far and not too close) and your letters should not be "thrown forward" or bounced up and down within that area.
Example of fingerspelling A-V-O-C-A-D-O.
The Directional Movement While Fingerspelling
When spelling double letters or starting a new word, you should slide away from the center of your body. That is, if you are right dominant, move outward from left to right just like you were reading a book. If you are left dominant, move outward from right to left which is actually backwards from the way you read. In both cases, DON'T move back towards the center of the body. Many new signers do this and it looks so awkward to seasoned signers, they can see the mistake immediately.
Example fingerspelling A-R-M-A-D-I-L-L-O.
Notice how the double L-L slides away from the body.
Common Formation Mistakes When Fingerspelling
There are several common letter formation mistakes that new signers make. Here are a few examples to watch out for.
The letter Z is produced with the index finger NOT the little finger.
This seems to be a misconception that started with incorrect information and then caught hold with some people, but it is INCORRECT! The letter Z is produced with the index finger.
Example "Z" handshape.
Use a closed E, instead of an open or "screaming" E.
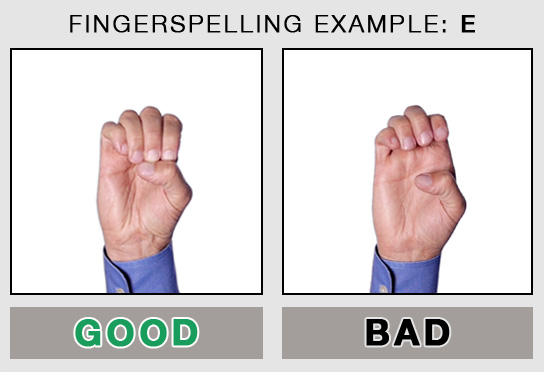
The letter E should be closed (as shown below) with the finger tips tight against the hand, not opened. An open E is sometimes called a “screaming E” because it looks like an open mouth that is screaming. This is not horrible, but it is something native signers will notice as sloppy form.
The screaming E has a tighter grip at the top of the fingers with the tips pulled back very tight against the lower part of the fingers, where the correct E (with the tips resting just over the horizontal thumb) are much loser of a grip and much more comfortable.
Because you have to pull the fingertips back much tighter to make the screaming E, it slows down the flow of the signing.
Example "E" handshape.
Point your fingers straight out over the thumb for letters M and N.
Other letters that can slow you down when fingerspelling if done too “tight” are the letters M and N. You will often see the fingers on the M and N folded over tight over the thumb. Again, this isn’t really wrong, as much as unnecessary. If your fingers are this tight over the thumb, it slows you down in your fingerspelling as you become more fluent. Leaving the fingers pointing straight out over the thumb frees up the hand to make faster movements while fingerspelling.
Example "M" handshape. |
Example "N" handshape. |
Do not use a flat hand when signing the letter O.
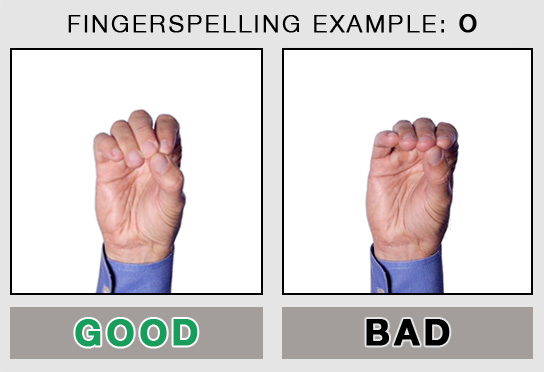
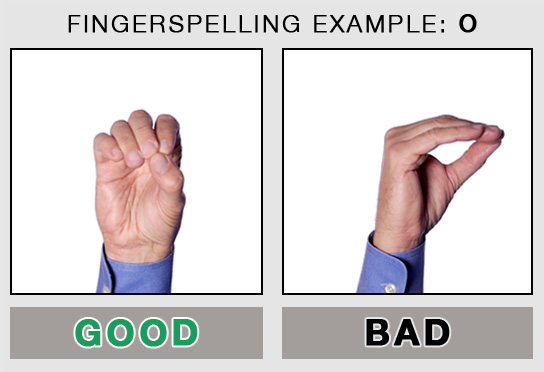
When signing the letter O, use a rounded O shape and do not make a flat O.
The letters O and C should face forward.
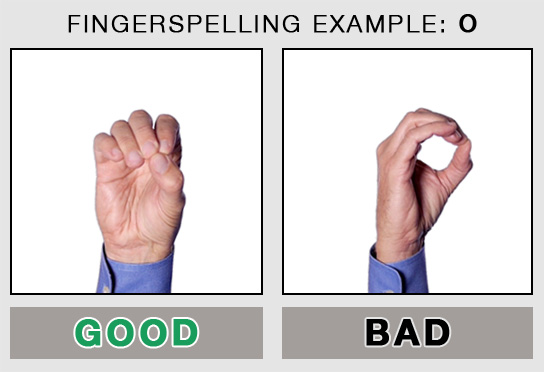
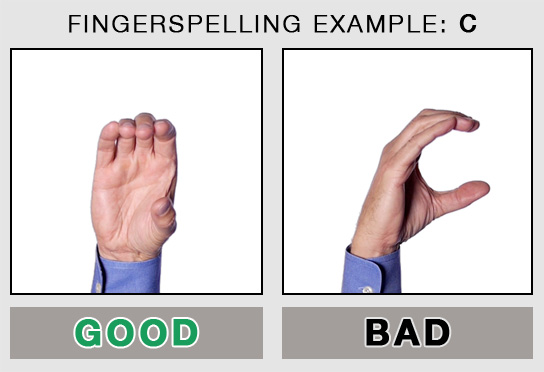
Another common mistake is that the letters O and C are turned to the side rather than facing outward like they should be. I think because many books will show a side or slightly turned angle of the hand in order for people to get the correct handshape, people think the turned O and C are the way to actually sign them. This is not correct. See the proper way below.
Example "O" handshape. |
Example "C" handshape. |
The letters K and P should face forward.
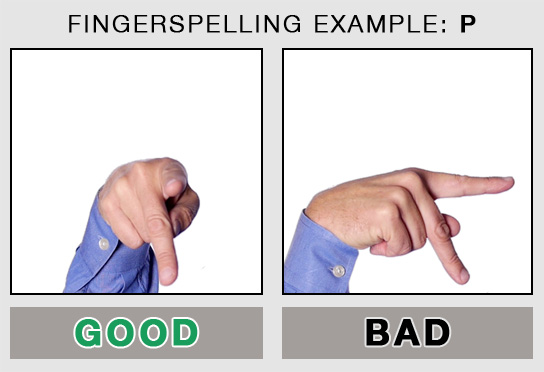
The letters K and P also run into that same issue. New signers want to turn them as they see them presented in books and they end up looking very awkward and uncomfortable to sign. Get the K-hand as it should be, facing forward, and then to go to the P-hand, just drop the wrist. The change from a K to a P is all wrist, nothing else.
Example "K" handshape. |
Example "P" handshape. |
The letters G and H should be turned sideways (so the palm faces the body).
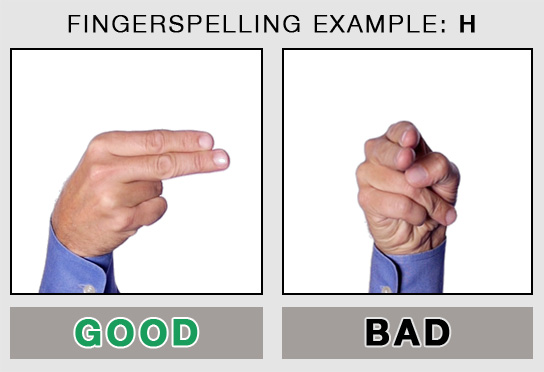
Many books will show these letters from a different angle in an attempt to show the handshapes better. The letters G and H should be turned sideways (so the palm faces the body). See the examples below.
Example "G" handshape. |
Example "H" handshape. |
Don’t Read the Letter Names, Sound It Out
Whether it is you signing the letters yourself (expressive skills), or you reading others fingerspelling (receptive skills), you need to think of the sounds that are connected to those letters, and NOT the letter name itself. This will help you to be able to figure out the words better down the road as you are trying to read bigger and bigger words. You may miss a letter, but if you have been saying the sounds in your head, you will more than likely be able to figure out the word.
Try it! In the example below, don’t spell out each letter as they are signed, sound out the word.
Reference Sheets to Help you with Fingerspelling

Signing Savvy Member Feature: Download this image / flyer as a printable PDF page.
 Tips When Starting to Fingerspell
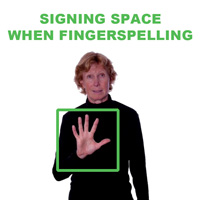 Signing Space When Fingerspelling
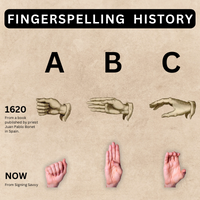 Fingerspelling History
ADVERTISEMENTS
Signing Savvy Promotions


Savvy User CarolynWednesday, September 19, 2018
I tried to read the sign by sounding out the letters as I went but missed something. I came up with pricnt. What did I miss or misread?